Shipments
CS-Cart and Multi-Vendor allow you to ship items from a single order in multiple batches and/or at different periods of time. These batches are treated as separate shipments of one order. This is useful when you have to deal with backorders regularly.
For example, if a customer orders several items that are out of stock, you can ship the in-stock items right after the order has been placed, and send the remaining items at a later date as a separate shipment.
View Your Shipments
- Go to Orders → Shipments to find the list of all the shipments created in your store.

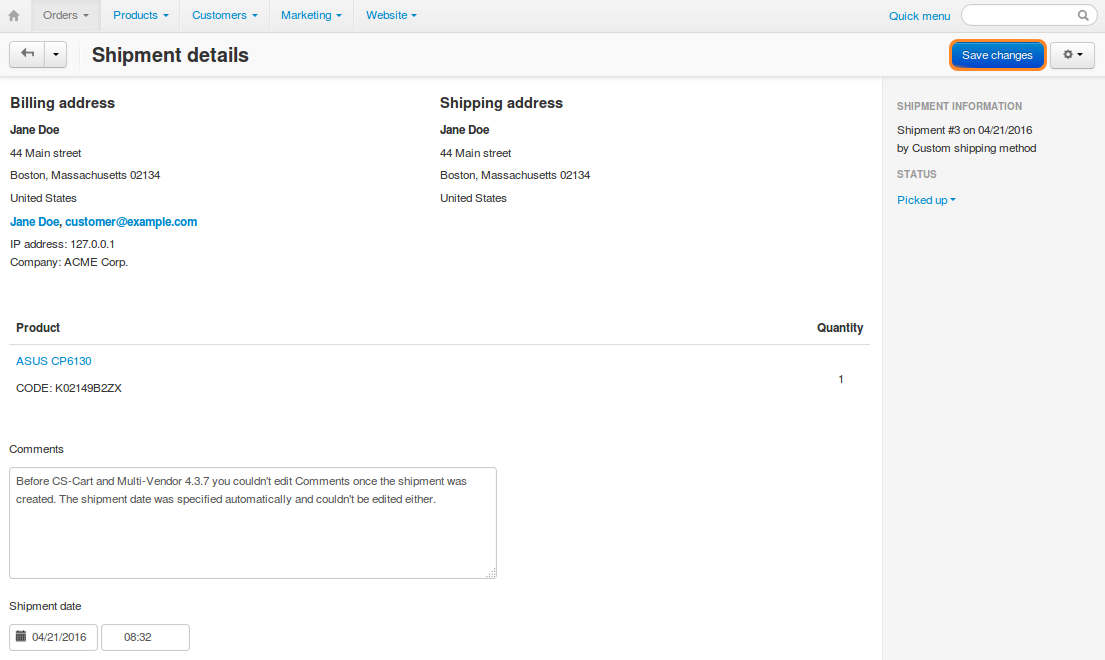
- Click the ID of any shipment to see the details of the particular shipment. You can edit the comments and date. Remember to click Save changes once you’ve done that.
How To: Create a Shipment
Shipments are created separately for each order on the order details page in the Shipping information section.
- Go to Orders → View orders and click on the ID of the required order.
- Create one or multiple shipments for the order:
- The quick way creates a single shipment for the entire order.
- The thorough way allows you to create one or multiple shipments.
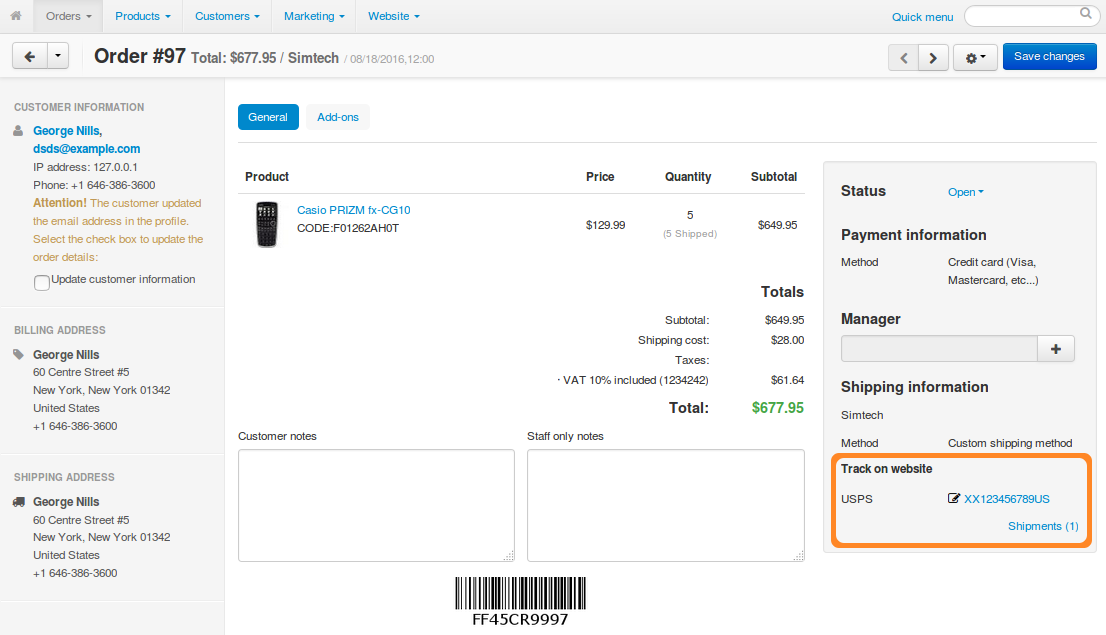
The tracking numbers that you enter will appear in the Shipping Information section. If you select a carrier, the tracking numbers will show up as links leading to the shipment tracking page at the carrier’s website.
The Quick Way
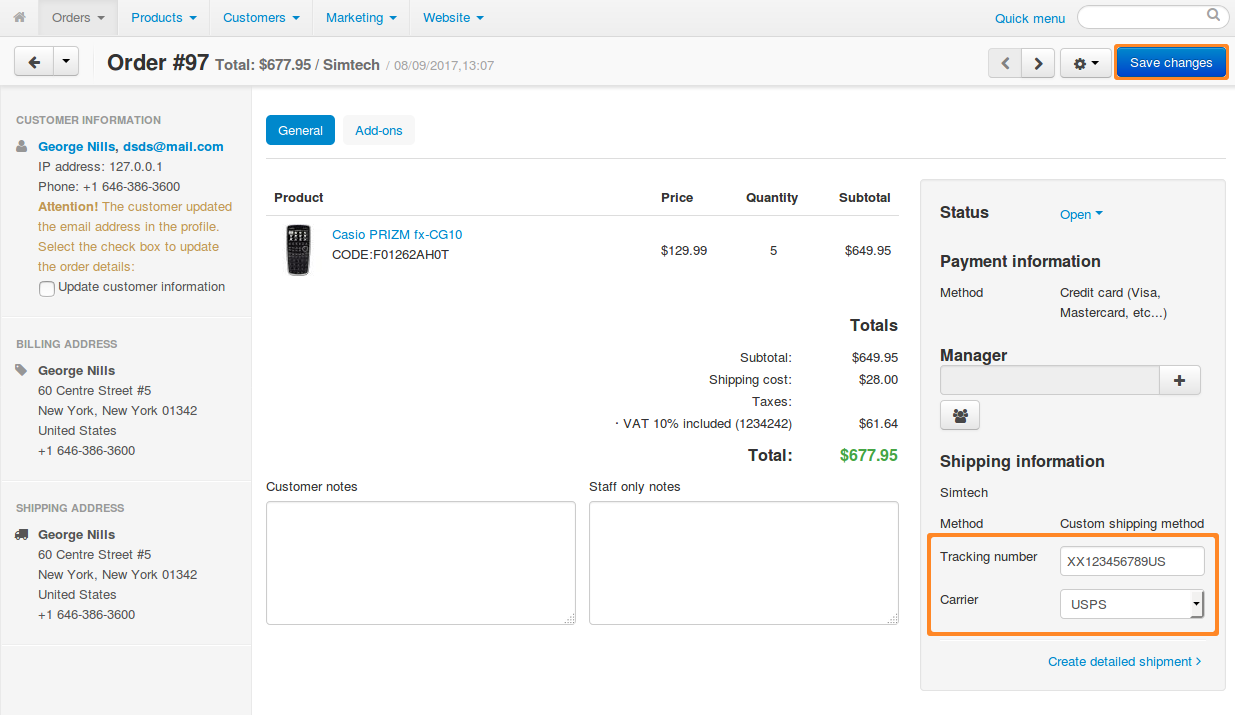
If you ship all the products in one batch via the same carrier:
- Select a carrier and/or enter a tracking number.
- Click Save changes. The shipment will be created automatically.
The Thorough Way
If you plan to ship products from this order via different carriers or just in separate batches:
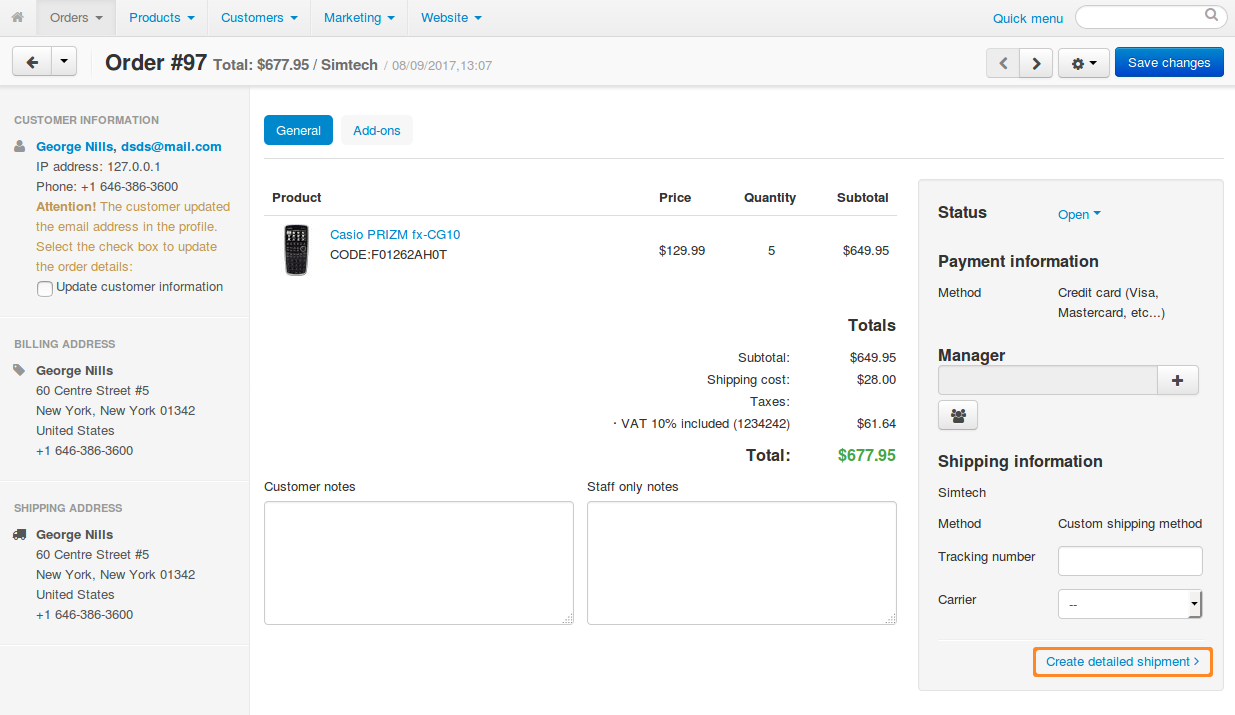
- Click Create detailed shipment.
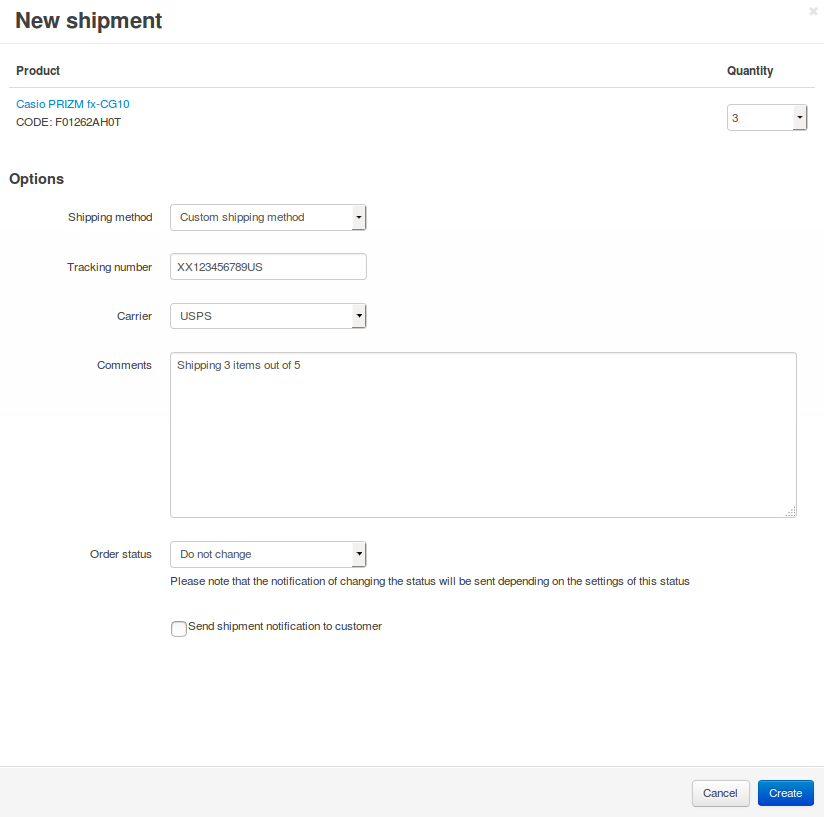
- The shipment creation window will open. For every product in the order, select the number of items to be delivered in the current shipment. If you plan to deliver a particular product in a different shipment, select 0 (zero) from the Quantity drop-down list.
- Choose a shipping method.
- Enter a tracking number and/or choose a carrier.
If you leave both the Tracking number and Carrier fields empty, the shipment won’t be created.
- Add your comments.
- Change the order status, if necessary.
- Click the Create button.
How To: Print Packing Slips
Print a Packing Slip for One Shipment
To print a packing slip for a particular shipment, follow these steps:
- Go to Orders → Shipments. You will see a list of all shipments in the store.
- Find the shipment you need. If necessary, use the search panel to filter the list.
- Click the gear button of the shipment for which you need to print a packing slip.
- Choose Print slip from the drop-down list, if you want a package slip to be displayed in a separate browser tab for further printing. If you want to download the slip in the .pdf format, choose Print packing slip (pdf).

Print Multiple Packing Slips at Once
To print several packing slips for multiple shipments at once, follow these steps:
- Go to Orders → Shipments.
- Tick the checkboxes of the shipments for which you need to print package slips.
- Click the gear button in the upper right part of the page and choose Packing slip bulk print.
- This will open a new page with the packing slips for all the selected shipments.

How To: Manage Shipment Statuses
If you go to Orders → Shipments, you will see all the list of all shipments in your store. Shipments have statuses, allowing you to sort the list, or to search for shipments with a specific status.
By default, there are 3 statuses: Packed, Picked up, and Shipped. However, you can edit them, or add your own statuses.
Shipment statuses do not affect anything—they only help you manage your list of shipments.

Add Your Own Shipment Status
- Go to Administration → Shipping & taxes → Shipment statuses.
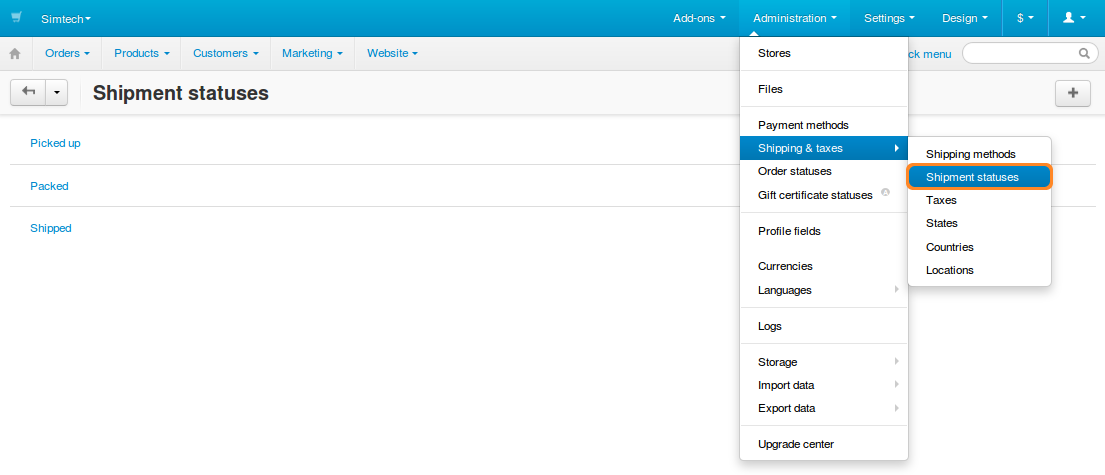
- Click the + button in the top right corner, and choose Add status.
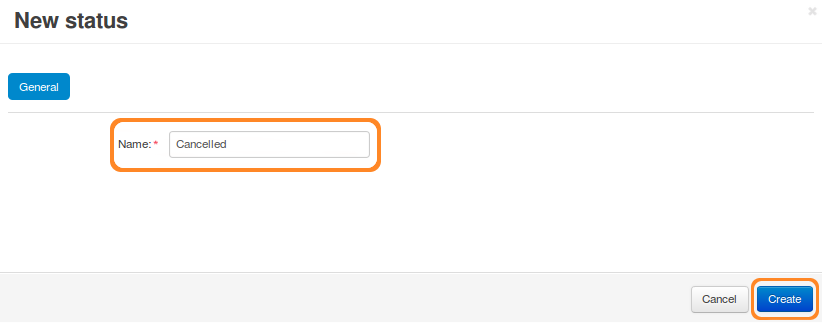
- Name your status and click Create. After that you should be able to select your status on the shipment list.
Delete a Shipment Status
- Go to Administration → Shipping & taxes → Shipment statuses.
- Click the gear button of the shipment status.
- Choose Delete.
You can also use the Edit action to change the name of the status.
